That is the official state question of New Mexico, USA; and one asked most any time you order something at a restaurant there (tho’ mebbe not at Starbucks).
We’re going red today – if you’re looking for green, I have a very pleasant recipe here – I came across an interesting recipe (again, from the nice folk at Cooking Light) that looked so very tasty that I only changed things a wee, tiny bit!
 INGREDIENTS
•1/4 cup ground dried red New Mexico chiles (5 or 6) – look in your market’s produce section
•1 tbsp canola oil
•1-1/2 cups chopped onion
•2 garlic cloves, minced
•2 cups unsalted chicken broth, divided
•2 cups water
•1 tsp crumbled dried oregano
 •1 tsp seasoned salt
•1 tbsp masa (not corn meal)
Cut the stems off the chiles and remove the seeds – don’t fret if you don’t get all of the seeds, they’ll just add a bit of heat to your chile sauce.
Pop the stemmed and seeded chiles into your food processor, fitted with the metal blade, and pulse until the chiles are well and truly ground.
 Note: 5 chiles yielded me a very scant 1/4 cup, so I just processed the entire bag and now have makings for more of this most excellent sauce.
Heat the canola oil in a large pan over medium heat, then add the onion and garlic and cook for three to five minutes, until the onion is tender.
Stir in the ground chiles, and then one cup of the chicken broth.
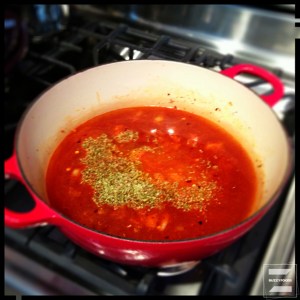
 Add the last cup of broth, along with the water, the oregano, and the seasoned salt.
Bring to a boil, then simmer, uncovered, for about twenty minutes to reduce the sauce a bit. The original recipe says to reduce until you have about three cups of sauce, but I see no way of telling that without pouring it all into a measuring cup, so I just set the timer, kept an eye on the pot, stirred every now and then, and guessed.
 Sprinkle the masa over the sauce and give a good whisk to blend in. If you have any stubborn lumps, fret not, they’ll be dealt with in the blender.
Oh. Did I not mention?
Yeh; this sauce is a tad heavy on the kitchen appliances, what with the processor for the peppers and now the blender at the end. I suppose that you could just grind your chiles in the blender? I dunno. The original recipe called for doing them in a spice mill or coffee grinder, but I don’t like to mix spices with my coffee grinder, so I opted for the  processor. Also, I needed to use the processor anyway for tomorrow’s (related) post, so I went with that.
Anyway, bring your masa-added sauce back to a boil for one minute, stirring, then remove from the heat and let rest for ten minutes (note those few stubborn lumps).
Transfer half of the slightly cooled sauce to your blender and cover, removing the feeder part of the lid to let steam escape.
 Cover with a towel (this stuff’ll go everywhere) and puree until smooth.
Transfer to a container and repeat with the remaining sauce.
Nice chile sauce!
I ended up with a touch over two cups total pureed sauce, which was just about the perfect amount for what I had planned.
 You can use the sauce QuickLikeABunny right away, or stash it in the fridge for up to three days.
So, you have this velvety smooth red chile sauce sitting on your counter or in teh fridge, now what?
Might I suggest cheese ‘n onion enchiladas? Apparently, in New Mexico, these would be made with flat layers of tortillas and cheese, kinda like a lasagna, but I did a little extra research and came up with a wicked nice option.
Check it out, tomorrow…

